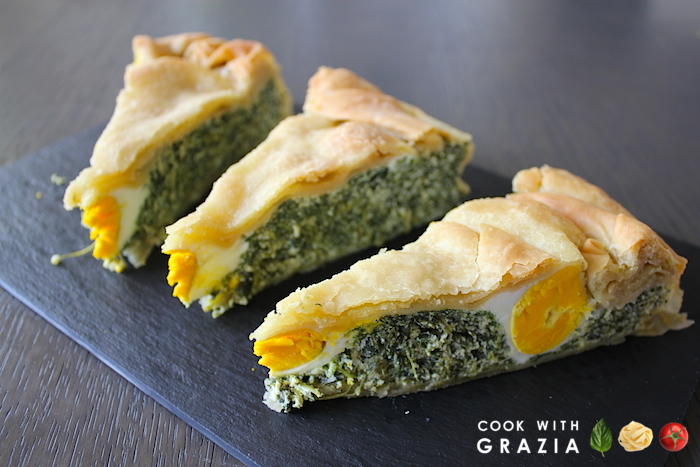
Easter Savory Pie
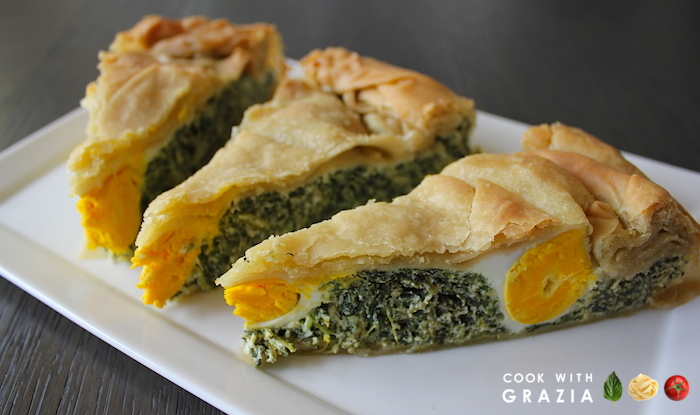
When I used to live in Italy il lunedì dell’Angelo, or Easter Monday, a group of us would gather and decide on a daytrip somewhere. This is actually how many Italians spend that day: out on a picnic or sightseeing. Where I grew up, in humid Pianura Padana, we would head to the hills for a wine tasting or to the coast, to smell the ocean breeze. We would either have lunch in a casual trattoria, or a picnic on a grassy lawn or even at the beach. There I discovered the Torta Pasqualina for the first time – and immediately fell in love. Originally fromGenova, this savory pie is probably one of the most famous traditional Easter dishes in Italy and easily available across the Liguria region and beyond. It’s fragrant, soft yet flaky shell unveils an aromatic, delectable filling made with classic spring ingredients: chard or mixed herbs (sometimes wild), succulent fresh and aged cheeses, hearty eggs.
This pie is a fantastic make ahead, perfect for multiple occasions: for lunch simply accompanied by a soup or salad, as a starter for any dinner. And it’s perfect as a potluck or picnic dish. It’s not too difficult to make: it requires some patience and … my step-by-step instructions. To simplify, you can also prepare the dough and cook the greens one day, and finish the assembly the following day.
| Active time: 1 hour Total time: 2 hours 10 minutes Yields: 8-10 peopleIngredients:
Tools:
|
 |
| Preheat the oven to 360°F.Wash and clean your chard or spinach. If you are using chard (this is actually the most original version) trim the stems and use only the leaves. Pour a cup of water in a skillet, turn the burner to medium-high, and toss in some of the greens (as much as will fit), gradually adding more as soon as they wilt. Stir occasionally to avoid burning. When all the greens have wilted, turn off the heat and let cool. |  |
| Meanwhile, prepare the dough. Use either an electric mixer, or even a bread machine (as I did in the photo: just the very first 10 minutes of the dough program will do). If using an electric device, always add the liquids first, and then the flour. In your machine, place 2/3 cup of water at room temperature, 3 tablespoons of extra-virgin olive oil and 1 and 2/3 cups of flour, reserving the rest for later use. Start the machine and mix until the dough appears smooth and elastic. |  |
| Since this is a small quantity of flour, it may be necessary to scrape the sides with a spatula to ease the process. |  |
| Flours are not all the same and may absorb different quantities of liquid: you may need to adjust by adding a sprinkle of flour if the dough is too sticky, or a teaspoon of water if it feels too dry. |  |
| If you have some kids to put to work (beware: you will still do the job!) or really like working with your hands, here are the instructions to do it manually: pour 1 and 2/3 cups of flour on top of a clean, smooth, non-porous surface (table or countertop) into a pyramidal shape (reserve the remaining 1/3 cup for later use). Create a well in the center and add 3 tablespoons of extra-virgin olive oil (reserve the rest for later) and about 2 tablespoons of water at room temperature. Start mixing the ingredients in the center, and gradually add another ½ cup of water, which should be enough to absorb this amount of flour. |  |
| Start kneading, using your hands to fold the dough ball in half, over and over, until smooth and elastic. Here as well, adjust by adding a sprinkle of four or a teaspoon of water if the dough appears too sticky or too hard. |  |
| Wrap the dough in plastic and place it in the refrigerator to rest. |  |
| Meanwhile, prepare the filling. Place a colander on top of a prep bowl. Remove the cooked chard or spinach from the pan and drain. |  |
| Squeeze the vegetables in your hands, a little bit at a time, to eliminate as much of the cooking liquid as you can. Discard the liquid or save for other recipes using vegetable broth. |  |
| Place the drained greens in another bowl, and add one pound of ricotta cheese, ½ cup of finely grated Parmigiano-Reggiano cheese, 2 eggs, 1 teaspoon salt, freshly ground pepper and the marjoram if you like it (I am not too keen on that flavor so I usually avoid it). |  |
| Mix all the ingredients. Set aside. |  |
| Pour the remaining 1/3 cup of extra-virgin olive oil into a small cup and with the help of a brush, grease the bottom and sides of your baking pan. |  |
| Now it’s time to prepare the pie crust. Traditionally, it is composed of 33 very thin layers, since Jesus was 33 years old when he died. Fortunately 3 layers for the bottom and 3 for the bottom are enough – and this is actually what most people do! First, let’s create the bottom. Sprinkle some flour on a clean, smooth surface. Grab your dough and cut off an abundant 2/3 of it, reserving the smaller portion for later. |  |
| Divide your larger portion into three equal balls. |  |
| With the help of a rolling pin, roll out one of the balls into a very thin roundish layer… |  |
| … so thin you can see the tips of your hands on the other side when you hold it. |  |
| When you roll out the dough, sprinkle the top with just a touch of flour, roll out one direction in front of you… |  |
| … then turn the dough ninety degrees and roll out the other direction. Next, turn upside down and repeat. Keep dusting your working surface and dough with just a tiny sprinkle of flour so that the pin rolls easily. But be careful not to add too much of it, or your dough will lose elasticity. |  |
| Lay the first thin layer of dough into your baking pan, being careful to leave 3-4 inches overhang. If the dough is not wide enough, just cover part of the bottom. This is actually totally fine. |  |
| Using a brush, spread the extra-virgin olive oil over the surface of the dough layer. |  |
| Repeat with the remaining two small balls of dough, layering it into the pan and oiling it each time. |  |
| Transfer the filling to the pan and smooth out the top. With the help of the back of a spoon, create 5 small wells, one in the center and four on the sides to host the eggs. |  |
| Crack one egg at a time and position it in each well. |  |
| Now divide the remaining dough into 3 equal portions. Roll out one at a time, draping it over the filling. Brush with oil. |  |
| Repeat with the other two balls. Always remember to brush on the olive oil. |  |
| Now seal the pie by wrapping the overhang around. |  |
| Continue to roll the edge until you have gone all the way around the pan. |  |
| Oil the rolled edge and in between the dough and the pan. |  |
| Bake in the oven at 360°F for an hour and ten minutes, until the crust is deep golden in color. |  |
| Let it cool for at least 15 minutes. To transfer, use a plate to flip the pie. |  |
Buon Appetito!
[…] Download Image More @ http://www.cookwithgrazia.com […]